Doctor Blade Wear Failure Mechanism and Standard Step-by-Step Replacement Process for Flexo Press
This technical article analyzes three stages of doctor blade gradual wear failure,lists standard safety replacement procedures,and introduces parallelism calibration and pressure debugging essentials after blade replacement to avoid stripe defects.
Flexo doctor blade undergoes three sequential wear stages during operation:initial edge running-in stage,stable normal wear stage and fatigue failure stage.In initial running-in stage within 0 to 24 working hours,blade edge micro-burrs are worn smooth with stable scraping effect.In stable wear stage from 24 hours to 14 days,blade keeps uniform contact without quality defects.In later fatigue stage,blade edge produces micro gaps and vibration,causing regular horizontal printing stripes.
Blade replacement must be completed before entering fatigue failure stage to avoid batch defective products.Early replacement causes unnecessary consumable cost waste,while delayed replacement brings continuous quality faults.The optimal replacement cycle is determined by anilox roller line count,blade material and daily printing mileage comprehensively.
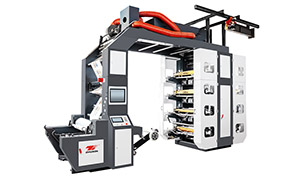
High Speed Flexo Printing Machine - Stack Flexo Flexo Printing Machine
Standard safe doctor blade replacement steps with machine power-off protection.Firstly,reduce press speed to full stop and cut off main power supply to prevent accidental roller rotation.Secondly,open ink chamber protective cover and release residual ink pressure inside the closed chamber.Thirdly,loosen blade holder fixing bolts and take out the old worn blade slowly without scratching anilox roller ceramic surface.Fourthly,install new blade into holder and lock fixing bolts evenly.
Key parallelism calibration after blade replacement is the most critical overlooked step.After new blade installation,manual feeler gauge detection is required to ensure blade and anilox roller keep full-length parallelism within 0.01mm deviation.Any parallelism error will generate continuous transverse color difference across full printing width.
Gradual pressure debugging process after blade replacement.Do not set working pressure to standard value directly after installation.Start with 30% low initial pressure for test printing,then increase pressure gradually by 5% each time until no residual floating ink appears on roller surface.Direct high-pressure setting will cause new blade edge chipping and roller ceramic surface scratch.
Post-replacement production monitoring standard:observe printed samples continuously for 30 minutes after blade replacement.If no fine longitudinal stripes and uniform ink density appear,the replacement and debugging process is qualified.Regular standardized replacement steps reduce blade installation failure rate to below 1.2% effectively.